SHQ

Keep calm and order on

Screen Shot 2015-10-05 at 12.11.00 PM

We’ve had some people report that their connection wasn’t secure on the StationeryHQ checkout page. It didn’t make sense since all of our security certificates are up to date, so we got right on the case! We did quite a bit of research and here’s what we found:

http://security.stackexchange.com/questions/85830/why-is-symantec-verisign-ca-appearing-as-an-invalid-authority

It has something to do with a user’s system certificate chain storage. We’re not going to pretend we fully understand this, but thought we should share the best research we found. We believe our site is as secure as possible and since we don’t store credit cards, you should be good.

We hope this helps.

USPS: Cost-Ineffective?

The holiday season can be a stressful time of year. Not only are we hustling and bustling, but we try to stay within a budget to make sure that we cover everyone on our shopping lists.

As stationery and gift makers, we have to add punctuality to that mixture. Shipping with USPS helps to shave some extra expenses, but at what cost? Is saving a few dollars worth not giving your loved one’s gift on time? Is it worth the wait?

Everything boils down to the value of time. Unlike money, once it’s gone, it’s gone.

To help weigh the costs, I’ve placed two mugs and a canvas gallery wrap in my StationeryHQ shopping cart, a fitting gift for my grandparents. Upon checkout, I can choose from the following methods to ship to Fremont, California:

  • USPS Priority Mail 1-Day® ($8.20)
  • UPS Ground ($9.22)
  • UPS 3 Day Select ($12.98)
  • UPS 2nd Day Air ($16.76)
  • UPS Next Day Air Saver ($27.59)
  • UPS Next Day Air ($31.77)

I can spend $8.20 for USPS to ship it in “1-Day”; however, their reputation proves that “1-Day” may equal to “1-week” (or more).

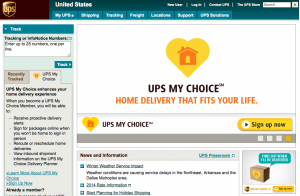
Screen-Shot-2013-12-10-at-10.14.09-AM-300x133Screen-Shot-2013-12-10-at-10.15.45-AM-300x196UPS, on the other hand, delivers on-time with options for notifications of your package’s journey.

At a little over twice the cost of the USPS option, I am guaranteed to have my package delivered in two days. If Christmas were two days from now, I wouldn’t take that risk.

Would you?

Share your thoughts in the comments below!

Let Your Design Shine

Need a little “glam” for your next piece? In case you didn’t already know, we offer foil stamping in an assortment of colors to add that special shine. Here are a few words from Red Pearl Designs:

The foil printing turned out beautiful! I was extremely impressed with the quality and fast service I received from StationeryHQ. Thank you for the great work!

RedPearlDesigns_image_201312-300x207

So, what are you waiting for? Let your design shine now.

You Asked. We Delivered. NSS 2013 Survey Round-up!

2013 marks our fifth year in attending the National Stationery Show (NSS); however, we haven’t always been known as “StationeryHQ”. In the first few years, we appeared as our corporate brand, PrintHQ, and our retail brand, Frecklebox. Nevertheless, we have always been StationeryHQ behind the scenes, and since then, we’ve been steadily growing with your continued loyalty and support.

We’ve learned a lot through these past couple of years, and we’d like to share some of that knowledge with you. At this year’s NSS, we had the pleasure of meeting and greeting many of our customers, and we gathered some of their thoughts and opinions on paper.

Here’s the Survey Round-up for NSS 2013:

1. Did you know about StationeryHQ.com before wandering aimlessly into our booth?

  • 34% : Nope! Not a clue.
  • 66% : Absolutely! How could I not?

2. What prevents you from doing more business?

  • 21% : My site does not have personalization technology.
  • 12% : My site does not accept orders.
  • 17% : I have tons of business so don’t get all up in my face about it. (Sorry!)
  • 50% : Other

3. What’s your biggest manufacturing challenge? Although some don’t manufacture, here are our visitors’ top five biggest manufacturing challenges:

  • Time/ Shipping times
  • Printing and quality
  • Price
  • Custom services (on metallics, letterpress, foil, lamination, envelope conversion)
  • Finding partners/vendors

4. Have you ever tried personalized direct mail to get new business?

  • 18% : Yes
  • 71% : No
  • 11% : WTF?

5. Do you totally wish we offered a printed proof for under $10?

  • 66% : Totally.
  • 22% : Not even a little bit.
  • 12% : It’s complicated.

6. What do you wish we offered on StationeryHQ.com? Here’s a snapshot of their wishes:

  • More paper stock options, such as colored and wood
  • More double thick sizes, such as coasters
  • Banners
  • Edging
  • Larger magnetic postcards
  • Tote/gift bags
  • Home Decor
  • Plates
  • Laser cut
  • Custom tissue

…and that’s it for the 2013 NSS Survey Round-up. We’re working through the survey list to see which products/services we can add this year.

Do you agree/disagree with what our booth visitors said? Share your “two-cents” in the comments section below!

We hope to see you all again next year!

Prepare Your Files for Custom Digital Printing

We receive a lot of questions from our customers regarding how to properly prepare and upload files to StationeryHQ to take full advantage of our digital printing services. Whether you’re creating custom note cards, customized greeting cards, digital letterpress stationery, wedding invitations or other personalized printed items, we can help you create high-quality products with your perfect design touch.

You can use our easy templates and online ordering system to create your own personalized designs. Want even more creative control over your custom stationery project? Not a problem. We can work with your unique designs, including die cutting, digital letterpress and more.

Whichever production option you choose, just follow these five simple tips as you prepare your files for digital printing to ensure your personalized paper goods are printed exactly the way you want them—every time.

Upload-1024x790

1. Sizing your artwork for digital printing. Make sure your file includes a bleed area on all sides. StationeryHQ requires at least 0.05 inches of bleed (0.125 inches is preferred) on each side to allow for trimming. Even if your project design is unprinted on all four edges, your production file should still include a bleed area.

2. Setting colors for proper printing. Convert all colors to CMYK—including PMS, spot colors and RGB—and make sure your document mode is set to CMYK. Please specify flat black (C=0, M=0, Y=0, B=100) instead of rich black. Any heavily saturated color should be under a combined CMYK value of 240.

3. Including your fonts. To ensure that your custom stationery project prints perfectly on our digital presses, please embed or outline all fonts.

4. Preparing file set-up. Don’t add “printer’s marks” such as crop marks, bleed marks or color bars. These will increase the document size, and you will not be able to upload your file, or your project will print incorrectly.

5. Saving a document for digital printing. Always save your document as PDF/ X-1A. This will flatten all the file layers correctly for our presses.

Our customer service team is available to help if you have any questions about preparing your project files for digital printing. Please contact info@stationeryhq.com for assistance.

How to convert your files to CMYK – #1 in our tutorial series

Today, we’re kicking off a series of short videos that we hope will make some of your lives just a little bit easier. Many of you are new to the world of digital printing, having come to us from various other related backgrounds including letterpress and photography, and we even have some self-taught designers. So for some of you, setting up files which will print exactly the way you want has been rather challenging.

Let’s start off by tackling the most common problem you’ve brought to our attention:

“My colors looked perfect on my screen, but when I received my order from StationeryHQ, the colors were wrong.”

99% of the time, this is because the file was submitted in RGB mode and/or used PMS colors (also known as Pantone or spot colors). Your files should be uploaded in CMYK format. So, you ask:

“How do I convert my spot and RGB colors to CMYK?”

Great question! Here’s how to do exactly that in any version of Photoshop or Illustrator:

“What’s the difference between RGB, PMS and CMYK anyway?”

Letterpress uses PMS and spot colors, which are pre-mixed ink colors. Your computer screen displays RGB colors, which are a combination of red, green, and blue light. Printing presses use CMYK inks – cyan, magenta, yellow, and black (also know as 4 color process) – to create all colors, but some RGB and PMS colors just can’t be reproduced in CMYK inks (these colors are known as “out of gamut”). When you convert your files to CMYK, you will see a shift in some colors. The ones which shift are out of gamut. Once you see this on your screen, you’ll have a pretty good idea of what the file is going to look like when it prints, so you can make adjustments to those colors if necessary.

To avoid these kinds of surprises and the need to convert your files later, you can simply start your design in CMYK mode whenever you are creating a file which needs to be printed.

(This is a quick and dirty explanation – it’s worth a Google for more thorough info.)

Have any questions about this topic, or any suggestions for future topics? Please post them in the comments!

SHQ Video Series: Welcome Walkthrough

I would like to personally extend a warm welcome to all of our visitors here at StationeryHQ. I know that with a new website comes some growing pains and confusion, so here is the first walkthrough in our new video series to help clear them away.

In this video, I guide you through the new site layout, covering product location, logging in, and help outlets.

Again, welcome to StationeryHQ!